IN THIS ARTICLE
在 Open 3D Engine 中使用 Recast Navigation Gem 查找路径
您可以使用 Recast Navigation Mesh 组件及其依赖项创建导航网格,然后使用 Detour Navigation 组件在导航区域内查找两个实体或两个点之间的路径。
创建导航网格
在 O3DE 编辑器 中,创建一个实体。
在视区或 Entity Outliner 中选择实体。
在 **Entity Inspector **中,单击 Add Component,然后添加 Recast Navigation Mesh 组件。
在 Entity Inspector 中,找到 Recast Navigation Mesh 组件,然后单击 Add Required Component。
选择 Recast Navigation PhysX Provider 组件。
在 Entity Inspector 中,找到 Recast Navigation PhysX Provider 组件,然后单击 Add Required Component。
选择 Axis Aligned Box Shape 组件。
修改 Axis Aligned Box Shape 以扩展到要导航的区域。
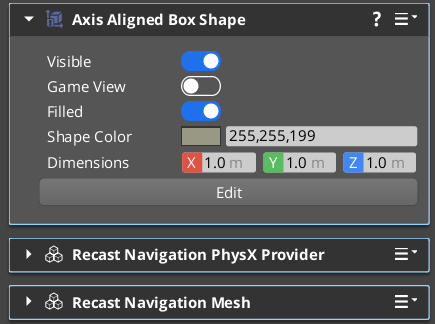
这三个组件共同构成并描述导航网格。Axis Aligned Box Shape 组件定义导航网格将覆盖的区域。Recast Navigation PhysX Provider 组件收集该区域内任何 PhysX 碰撞体的几何体数据。Recast Navigation Mesh 组件根据几何数据计算导航网格。
可视化 Navigation Mesh
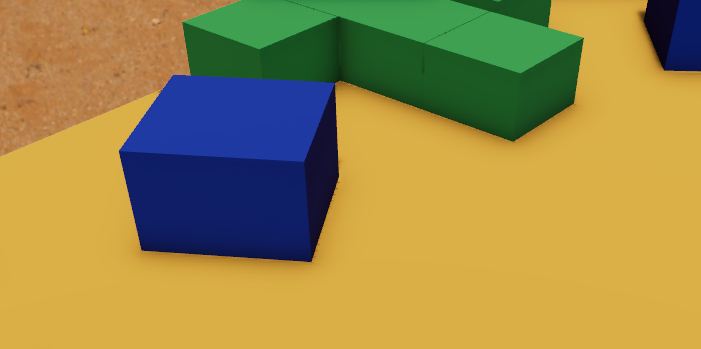
可视化导航区域以确认导航网格已正确配置。以下是 AutomatedTesting 项目的 Navigation Sample 关卡中关闭了可视化效果的示例。
通过以下步骤启用可视化。
在 O3DE 编辑器 中,选择视区中或 Entity Outliner 中带有 Recast Navigation Mesh 组件实体。
在 Entity Inspector中,找到 Recast Navigation Mesh 组件,然后启用 Debug Draw 属性。
或者,使用 CVar
cl_navmesh_debug为所有导航网格启用可视化。然后按 CTRL+G 或通过主菜单 Game -> Play Game 进入游戏模式。
观察导航网格的可视化效果。
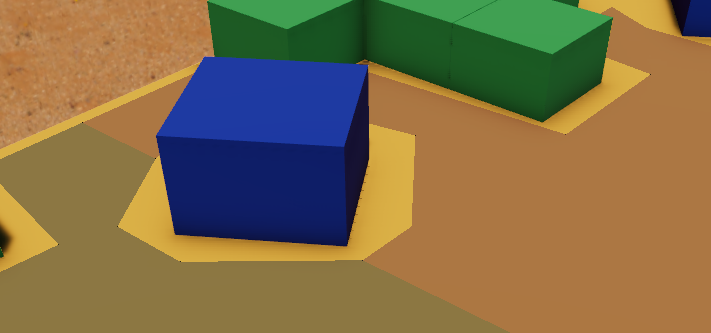 Note:在此示例中,您可以看到不同颜色的平面分层在关卡中的物理碰撞体之上。不同的颜色表示导航网格的不同部分,这些部分拼接在一起以形成更大的区域。这些部分称为 导航磁贴。您可以使用 Recast Navigation Mesh 组件的 Tile Size 属性来配置这些图块的大小。每个导航图块都将单独计算和处理,从而实现更快的更新。Important:Recast Navigation Mesh 组件不会计算导航区域,直到使用 C++ 和脚本 API 被告知为止。有关详细信息,请参阅下一节。
计算或更新导航网格
激活后,Recast Navigation Mesh 组件会为导航网格计算做好准备,但由你使用 C++ 或脚本 API 调用更新。
以下是从 C++ 更新导航网格的步骤。
将
Gems::RecastNavigation.API目标添加到您将调用更新的代码中。使用RecastNavigation::RecastNavigationMeshRequestBus,调用
UpdateNavigationMeshBlockUntilCompleted以获取更新导航网格的阻塞方法。
// From Gems\RecastNavigation\Code\Include\RecastNavigation\RecastNavigationMeshBus.h
RecastNavigation::RecastNavigationMeshRequestBus::Event(navMeshEntityId,
    &RecastNavigation::RecastNavigationMeshRequestBus::Events::UpdateNavigationMeshBlockUntilCompleted);
- 使用
UpdateNavigationMeshAsync异步更新导航网格。将使用RecastNavigationMeshNotificationBus通知事件总线通知更新完成。
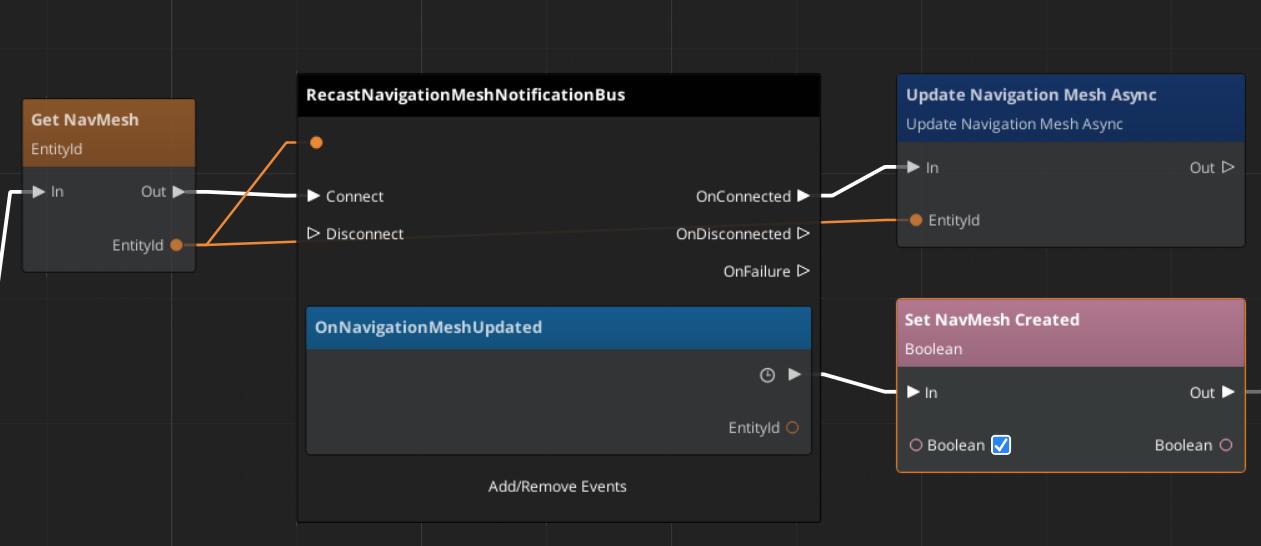
以下是从 Script Canvas 更新导航网格的步骤。
创建新的Script Canvas。
搜索 Recast 节点。
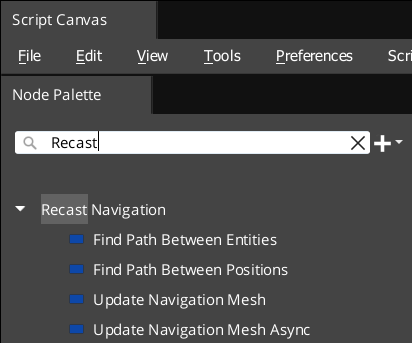
Update Navigation Mesh 是阻止更新。EntityId 必须指定具有 Recast Navigation Mesh 组件的实体。

Update Navigation Mesh Async 是异步操作。您应该连接到 RecastNavigationMeshNotificationBus 以接收更新通知。以下是 Automated Testing 项目的 Navigation Sample 关卡中的一个示例。
查找路径
使用 Detour Navigation 组件查找给定导航网格中实体或位置之间的路径。
在 O3DE Editor 中,创建一个实体。
在视口或 Entity Outliner中选择实体。
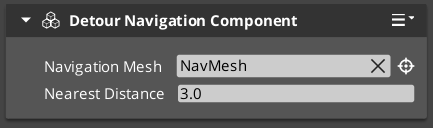
在 Entity Inspector中,点击Add Component,并添加Detour Navigation组件。
在 Entity Inspector 中,找到 Detour Navigation 组件,然后将 Navigation Mesh 设置为指向具有要用于导航的 Recast Navigation Mesh 组件的实体。
    Note:
      每个 Recast Navigation Mesh 组件可以有许多 Detour Navigation 组件。一种方法是将 Recast Navigation Mesh 保留在关卡上,同时为要导航的每个实体添加单独的 Detour Navigation。另一个设计思路是构建一个中间组件,该组件充当吞吐量平衡器,如果您发现 Detour Navigation 组件正在成为您的性能瓶颈,则限制您调用 Detour Navigation 组件的频率。
Detour Navigation组件提供 C++ 接口来查找路径。
// From Gems\RecastNavigation\Code\Include\RecastNavigation\DetourNavigationBus.h
RecastNavigation::DetourNavigationRequestBus::EventResult(waypoints, detourEntityId,
    &RecastNavigation::DetourNavigationRequestBus::Events::FindPathBetweenEntities, entity1, entity2);
// Or
RecastNavigation::DetourNavigationRequestBus::EventResult(waypoints, detourEntityId,
    &RecastNavigation::DetourNavigationRequestBus::Events::FindPathBetweenPositions, position1, position2);
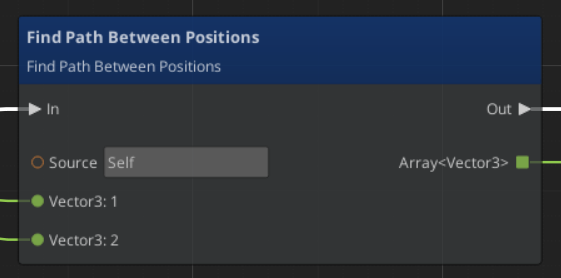
Detour Navigation 组件提供脚本接口来查找路径。
Note:有关使用这些组件和 API 的示例,请参阅 Automated Testing 项目的 Navigation Sample 关卡。
配置 Navigation Mesh
单个导航网格定义特定角色类型的导航网格。您需要创建多个 Recast Navigation Mesh 组件(在单独的实体上),每个角色类型一个。
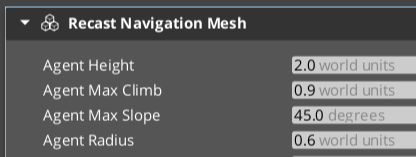
以下是重要的 actor 参数:
Agent Height 和 Agent Radius 定义代理的形状。
Agent Max Slope 和 Agent Max Climb 定义此类型的代理在 Navigation Area 内爬升的能力。